Catching up from the Deadzone Nexus Psi Campaign that we played a couple of weeks ago. Bolt Action has delayed me posting this!
The Plague victory over the Marauders in the Gauntlet (See Part 4!) was a narrow one and did not improve the situation for the Plague other than I now had the role of ‘Attacker’. So I chose to go back to Bunker Hill. Reasons were easy – I needed the massive Frag Bombardment at the beginning to try and balance out the forces, as I was taking a host of New Guys. Joe opted not to go back to Bunker Hill with his experienced force. Unsurprisingly, he chose to play one of his ‘trump cards’ and chose Scenario Y – Ambush! This reversed the roles from Gauntlet and put the Plague in the middle outflanked by the Marauders on two sides. All the Plague had to do was get off the board.
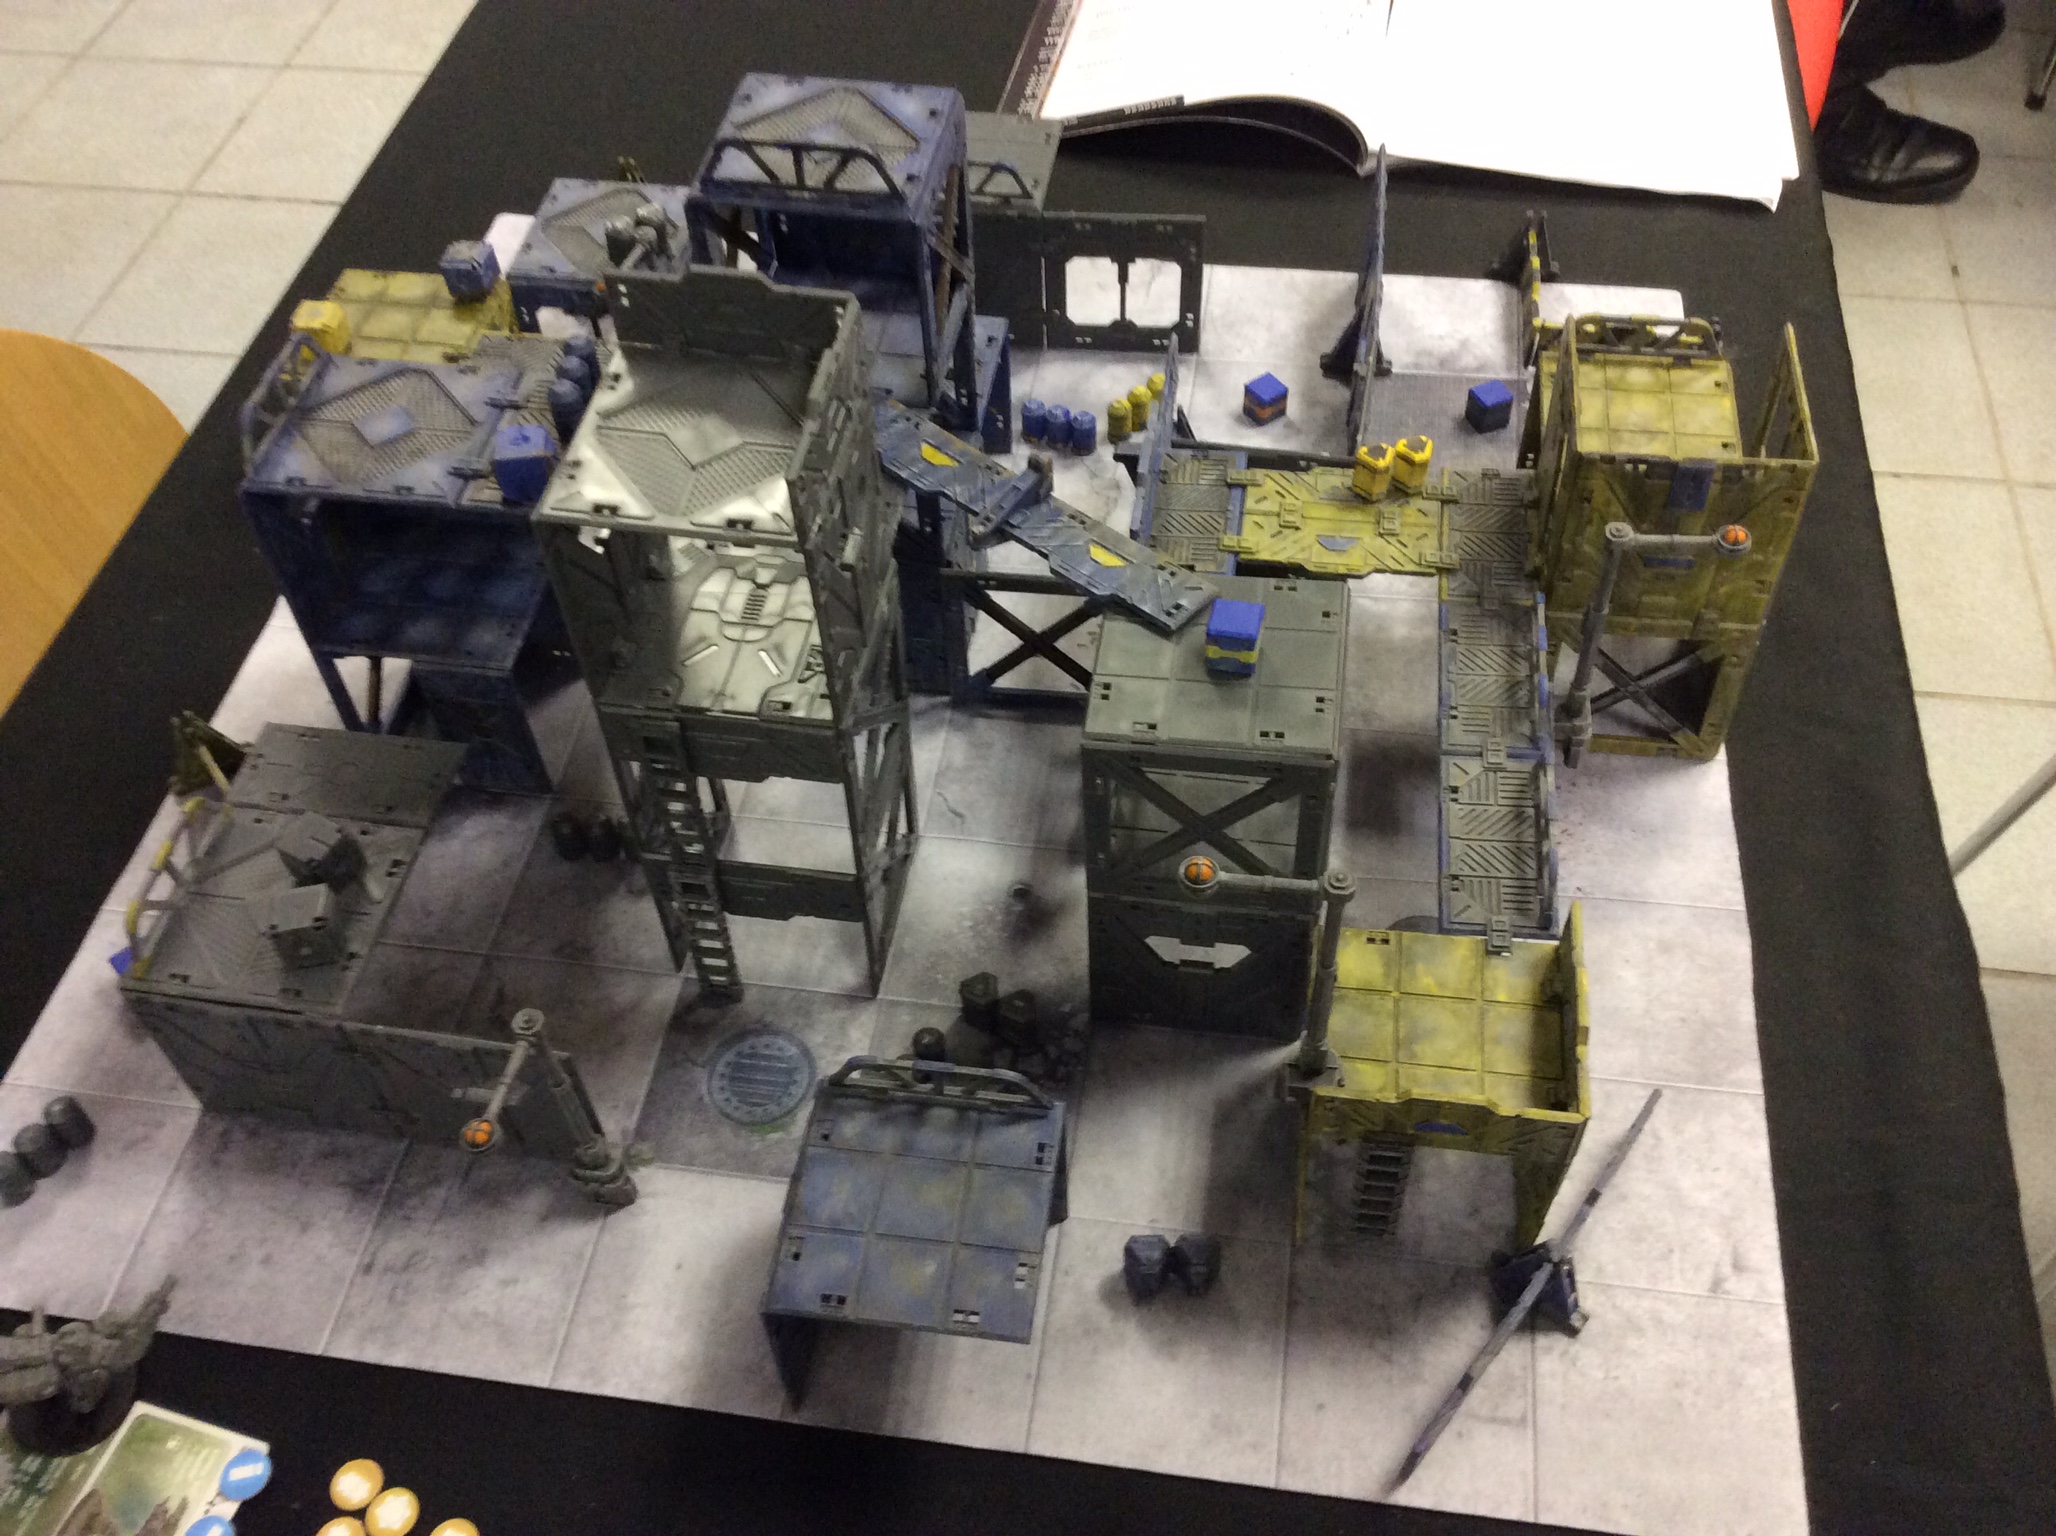
The battlefield. The Plague will deploy in the centre.
As defender I got to set up the board. I went with height as the primary defence against the Mawbeasts and built up the centre of the board and tried to make walkways out to the edges to give me a straightforward exit plan. The edges were lower level, but there was still plenty of cover around for the Marauders to use. Joe chose the orientation of the deployment zones once I’d set up the terrain, and I then deployed.
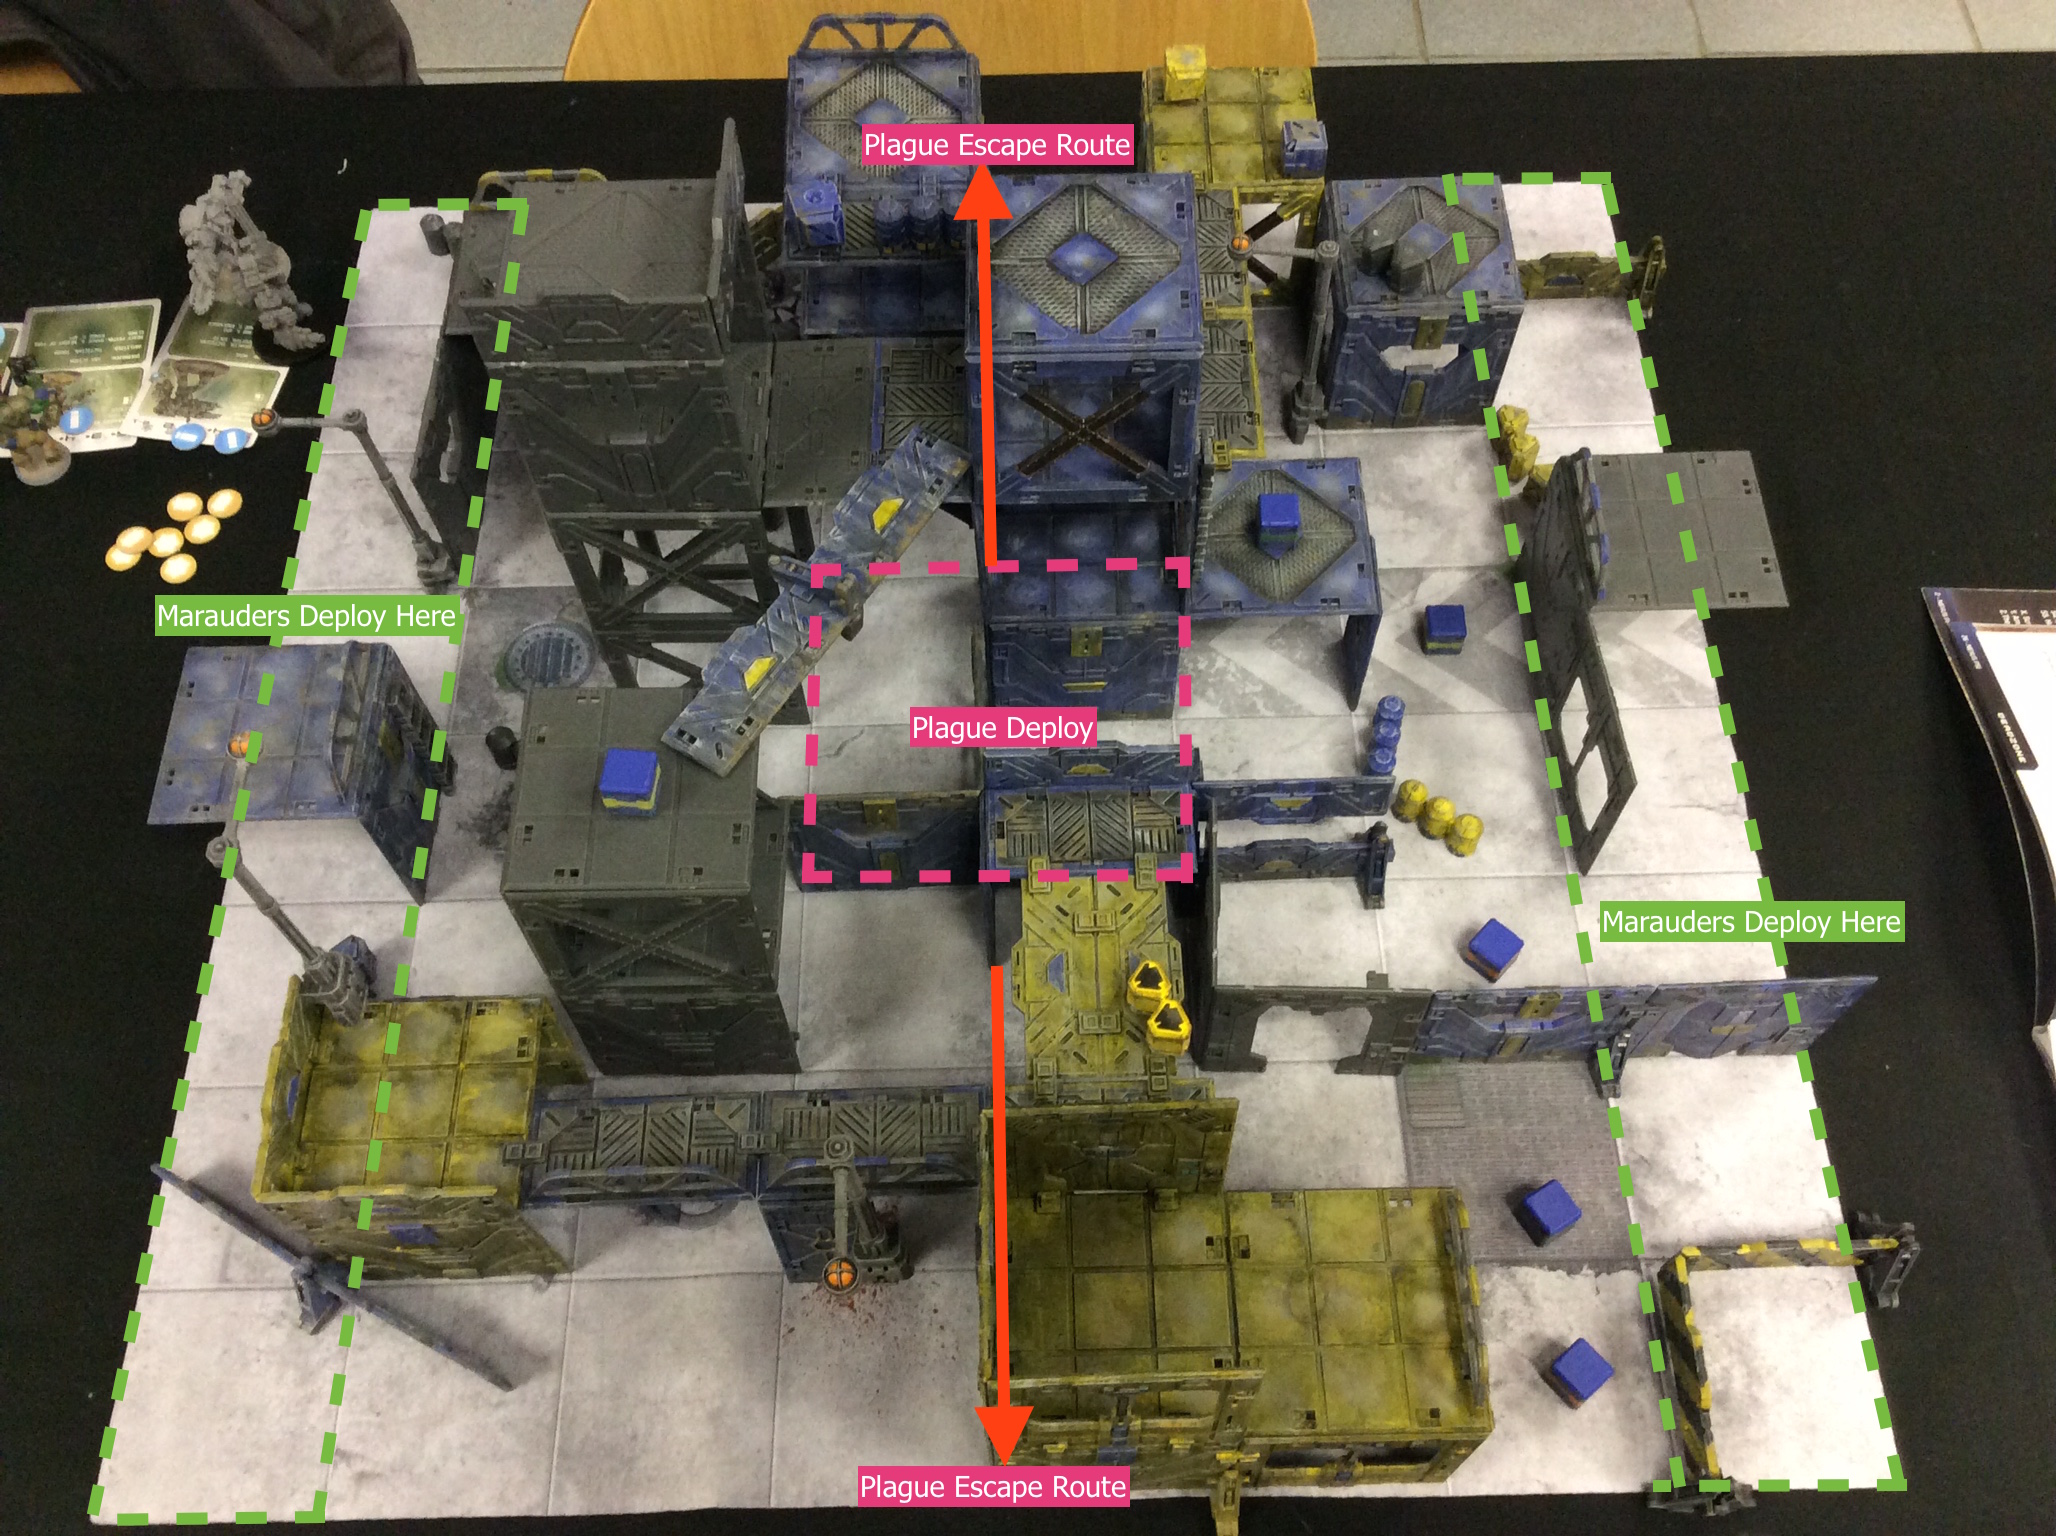
The deployment areas

I tried to use height to my advantage
My force looked like this:
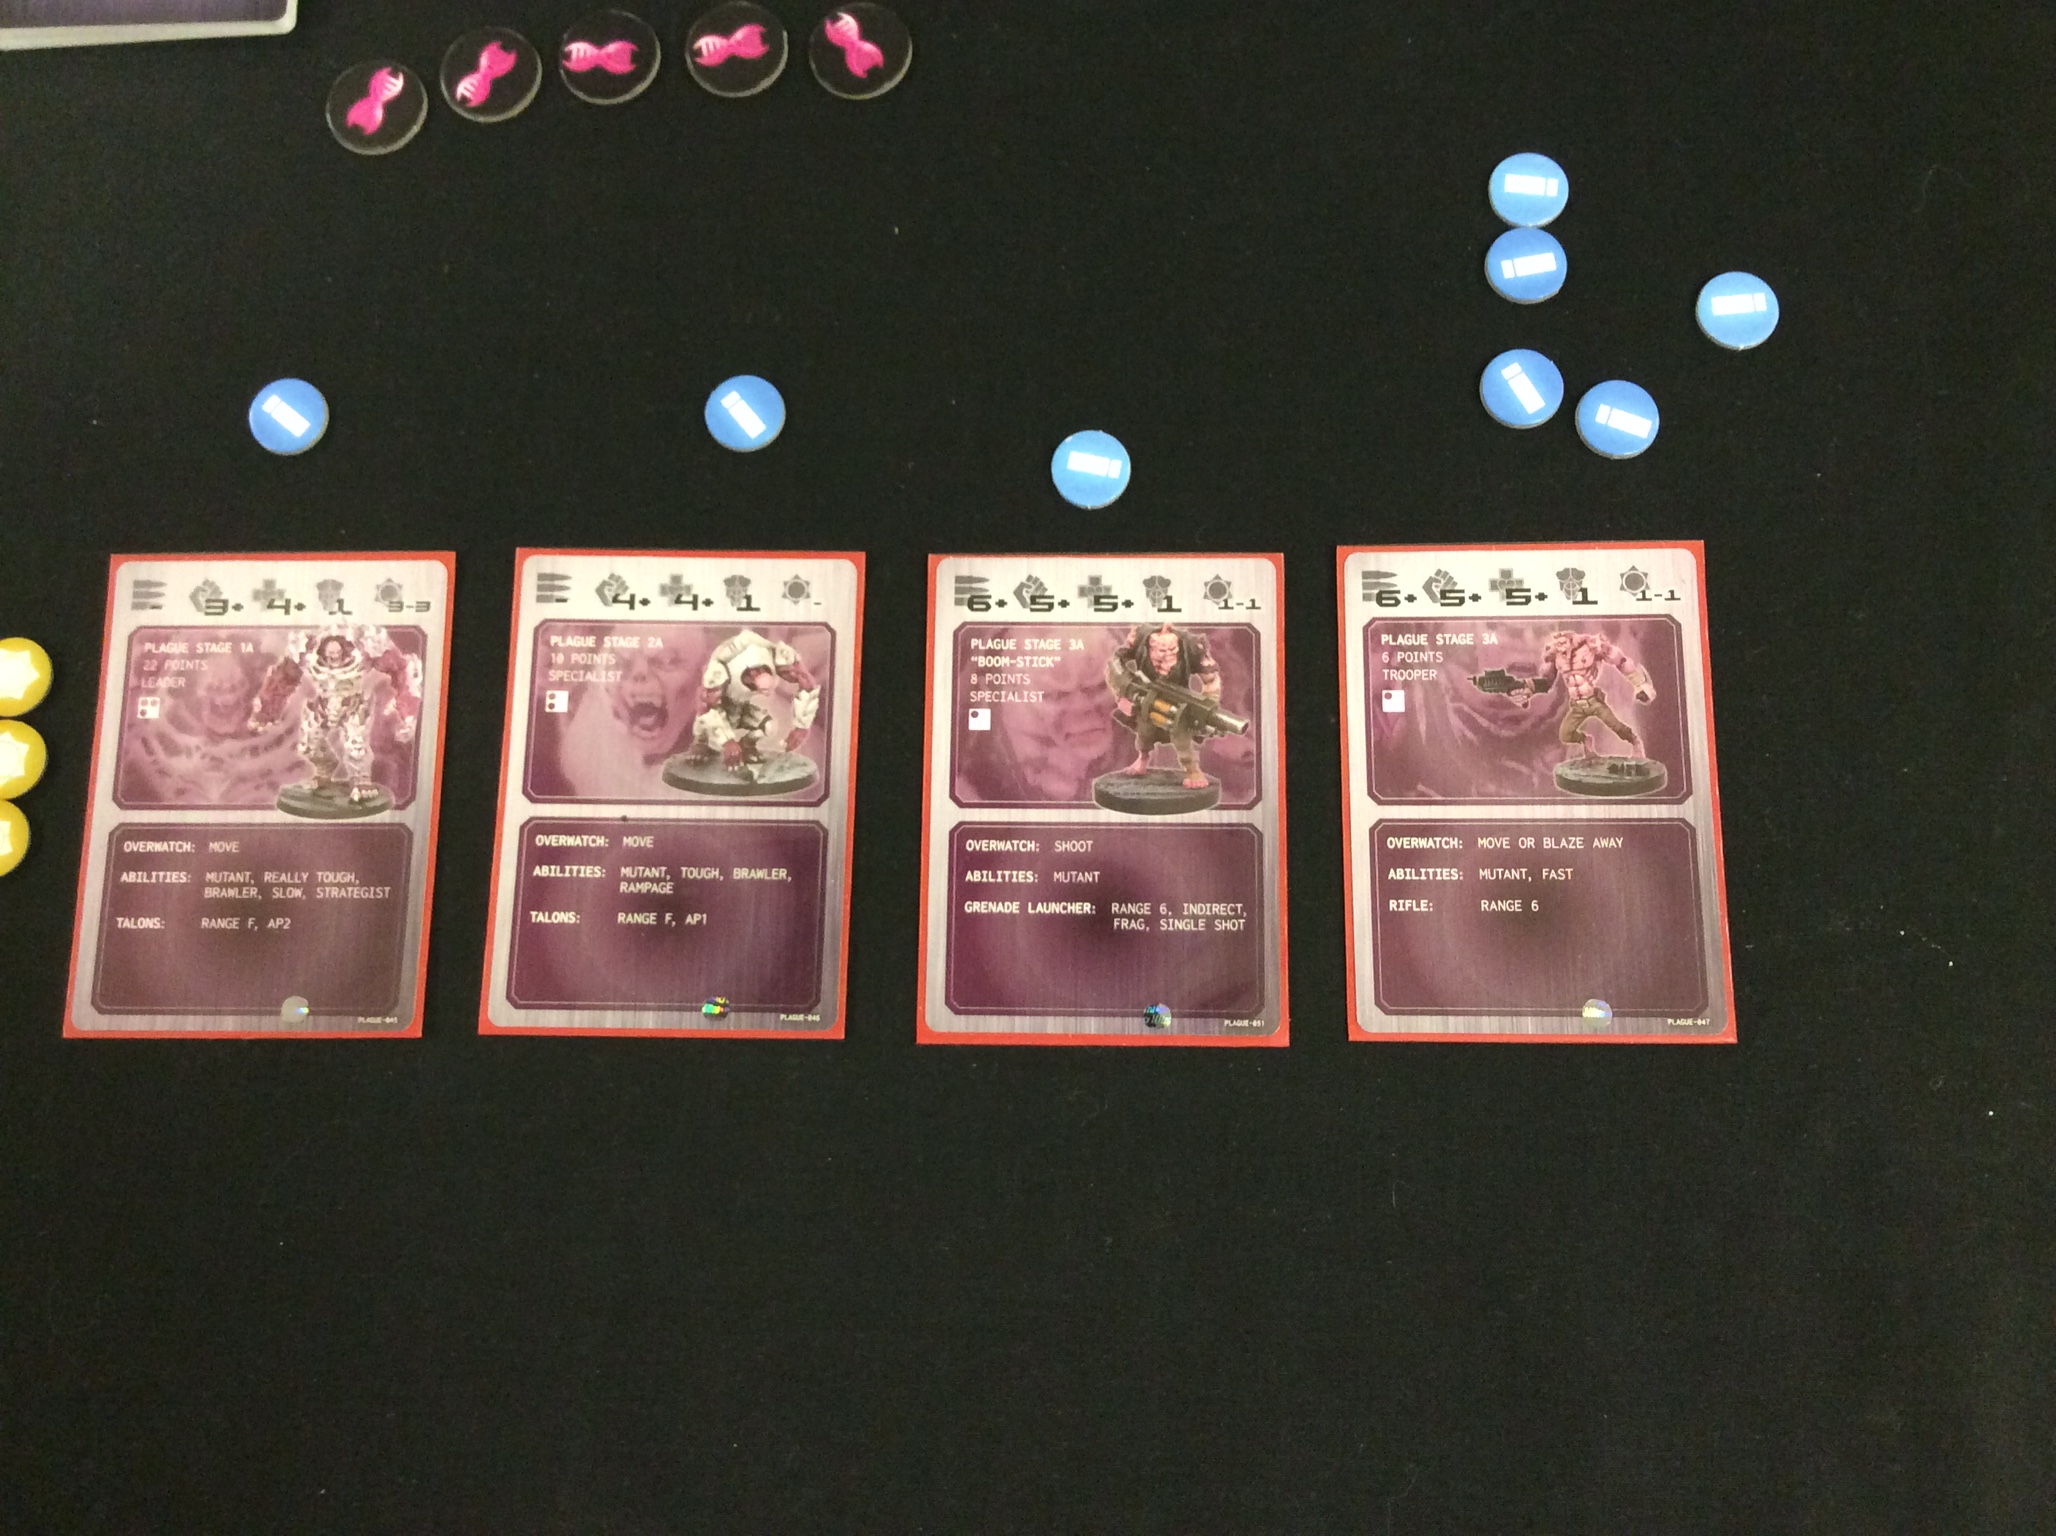
1 x 1A Plague Lord, 1 x 2A, 1 x Boomstick and 5 x 3A (New Guys) – 70pts
With my reputation I’d bought another Boomstick guy (I didn’t risk resurrecting the old guy) and the rest of my points were then spent on New Guys. I got 5 x 3As for my money. I chose not to level up my 1A or my 2A as the points increase would have limited the number of models I had this battle. The plan was if I survived I would level up ahead of the next battle. All of my strike force except Boomstick would start the battle enraged.
And they deployed like this:

The 1A stayed low, the rest went high
My deployment was easy enough – I put most of my force up high in the centre. The only exception was my 1A. As a slow mover, I left him at level 2, hoping he would soak up some Marauders allowing the rest of the team some chance of escape. With fast moving New Guys, I had a slim chance of getting some of them off the board.

The 1A angry at being caged in… (the unpainted guy above is the Boomstick proxy)
Joe’s list had 2 Maulers in it, 4 Mawbeasts, 4 commandos and his warlord.

4 Mawbeasts and lots of command actions… standard Marauder set up?!?
Most of his models had some XP and some stat or ability improvement, plus he had a big pool of command actions. I could see where this was going! He deployed like this:

2 Mawbeasts, 3 Commandos and a Warlord on one side (there’s a Commando under the roof tile)

2 Mawbeasts, 2 Maulers and 2 Commandos on the opposite side
Joe set up along two sides of the battlefield, spreading his force equally and putting 2 Mawbeasts on each side. This effectively covered all the exits, as I was unlikely to be able to outrun a Mawbeast – Joe was going to be moving first as the attacker. The scene was set for a Plague vs Mawbeast clash.
This turned into a bit of an epic fight. The summary of the action is like this:
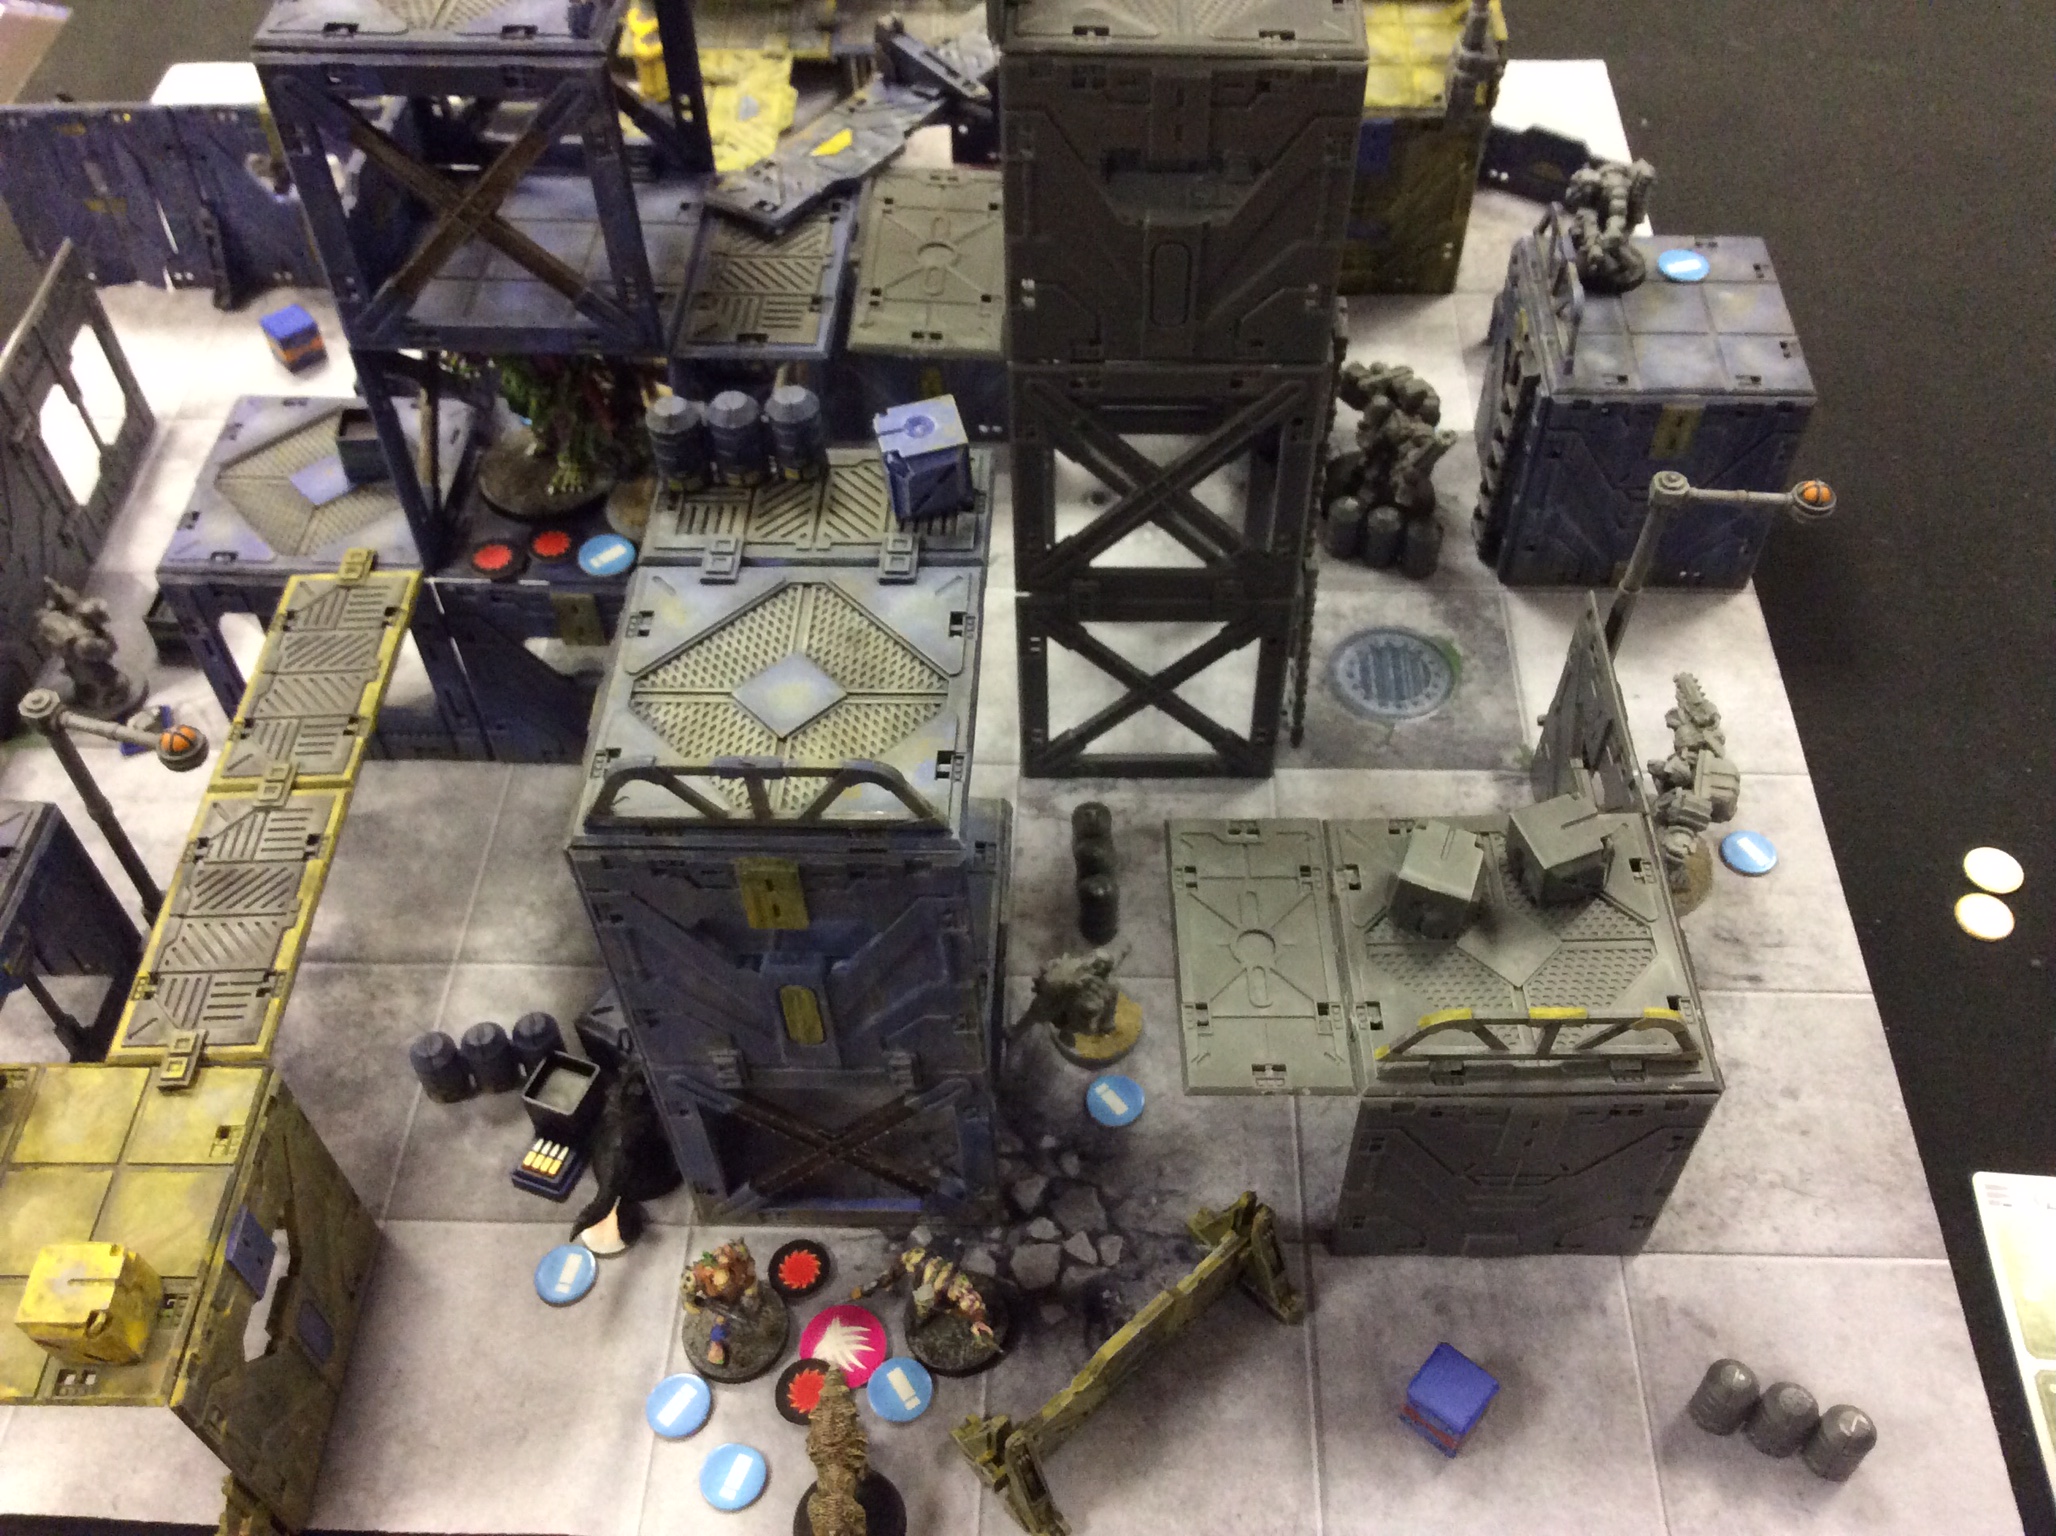
Marauders Round 1 Turn 1: The Marauders went for the big kill straight from the off, with a Mawbeast and a Warlord both charging into my 1A and setting up what would be a long running brawl. No obvious victor in this Round, so the fight would go on. Blaze away actions from the Commandos managed to pin a couple of 3As up top.

The Marauders swarm the 1A
Plague Round 1 Turn 1: I started the escape plan. The pinned 3As and the 2A moved along the walkways in a desperate attempt to reach an exit. Starting from a pinned position, there was no way I could get enough separation between them, so had to leave them open to a chain fight and pray that they could hold off Mawbeasts long enough. A final 3A went in the opposite direction to try and force Joe to splits forces. One 3A found a frag grenade. Useful if he could stay alive long enough to use it!

The Plague head for the exits
[Rules check – Boomstick went onto overwatch (you can see the counter in the photo), but with an indirect weapon which by the rules isn’t allowed to fire in Round 1. So Joe allowed me to cancel the overwatch and keep Boomstick ‘unactivated’ until my next turn.]
Marauders Round 1 Turn 2: Boomstick couldn’t overwatch so he did not stop a Mawbeast receiving a Command Action which allowed it to advance and move up to fight the nearest fleeing 3A New Guy. The fight was one sided and a 3A was munched. The now enraged Mawbeast then jumped across, munched the 2A in similar style and finally jumped up to the 3A with the newly found Frag grenade and munched him too. The combination of fast moving Mawbeasts with Command Actions meant that they could reach just about any cube within the first activation – nowhere was safe!

Mawbeast does a Pac Man
Plague Round 1 Turn 2: I moved my remaining troops away from the advancing Mawbeast and headed for the opposite exit! I had nothing to counter the Mawbeasts with, other than Boomstick (who couldn’t fire until Round 2). New Guys with 2 base dice are not much good in a fight, or at shooting. Boomstick moved down a level to open a crate and found an intel item – useless! A 3A up top managed to pin a Mawbeast blocking the exit. With all models activated, the Plague would hold initiative in Round 2.

The End of Plague Activations in Round 1
Marauders Round 1 Turn 3: The Commandoes managed to suppress Boomstick, and there was some crate opening.

The End of Round 1
Round 2: The fight in the cage continued with no wounds and no advantage between the Plague Lord and the Warlord/Mawbeast combo. The fight would go on. Boomstick received a courage card, got mean and then fired a grenade at a Mawbeast – success! However the Mawbeast was only pinned, along with a nearby Mauler. The Marauders were not halted for long.

A grenade causes minor inconvenience to the Marauders,
All of my 3As moved down to ground level to fight the Mawbeast blocking the exit – one got munched but no harm was done to the Mawbeast despite the massed number of Plague Troopers. The escape plan for the Plague was not going well!
On the Marauders activation, Boomstick got munched by a Mawbeast, and the 3As fought on bravely. I was now down to 3 models left.
The Mawbeasts close in on the last of the 3As
In Round 3, I lost the rest of my 3As without getting one off the board. I tried to get one to break away I think, and that failed, so the Mawbeast got a free attack and munched his oppo. The Plague Lord was now the only Plague force left out of my entire starting force and all reinforcements. The fight in the cage rumbled on…..

And the 3As were gone… munched, not escaped.
From Round 4 onwards Joe did his best to scratch the 1A. He flung Mawbeasts at it and even set up a Commando firing squad with a clear shot to try and shoot it. All to no effect.

A Commando firing squad assembled to try and put the Plague Lord down.
Round 4… Round 5…. A Mawbeast gets killed! Another one charges in to the fight…. Round 6…. Round 7…. Round 8…
Eventually, the game timed out, with Joe using all the Marauders Battlecards to bring the game to an end. The fight between the Plague Lord, the Warlord and the Mawbeasts was never resolved.
However, we ruled that because of the fact that the Plague Lord didn’t escape the board, there were no other Plague forces alive and because of the number of Marauders left with considerable XP that the Plague forces had been well and truly eliminated.
A campaign win for the Marauders! The Plague were effectively tabled, although the Plague Lord 1A has never yet been wounded in any fight. I’m sure the Plague will be back!
Well played Joe. He played to the Marauder’s strengths, which appears to be Mawbeasts and Command Actions. When a fight chain gets interrupted it just takes a Command Action to start another one. With so many New Guys and no XP whatsoever, I couldn’t muster the dice to combat the melee ability of the Mawbeasts.
We didn’t keep count (and I’m not about to go back and check!) but I suspect that about 80 – 90% of the Plague casualties throughout our Nexus Psi adventure were caused by Mawbeasts. I know I made some mistakes along the way with deployment and movement, but I suspect the Mawbeasts are somewhat overpowered, especially when they’re in a force that can muster a bucket full of command actions quite cheaply. Just my impression – but I think if I ran the campaign again, I’d have to take the Enforcers for their better survive stat against a Marauder force. I can see no way the Rebels with their average shooting and limited Command values could make a fight of it. Maybe a solution is to make the Mawbeast a specialist? I dunno – tweaking the stats to make them less fighty doesn’t seem like the right solution – maybe Jake will revisit them. In the Marauders favour though, whenever Joe had a choice for levelling up or stat improvements he went with improving Command ability on Commandoes and improving Mawbeast fight stats – so his strategy was certainly biased in favour of the Mawbeasts, and I couldn’t generate enough to fight them due to high casualty rates. I think the jury is still out, and more play is required with a better tactical approach from me!
Great campaign to play, and really added to the Deadzone experience. We’ll be playing some more in the future as more forces arrive – Plague and Rebel support boosters are still on order!
Thanks for stopping by.
